Preparation
Start
Start of preparation
| Owner: | Head Screening | Executive: | Screening Specialist |
|
Important notes:
|
| Do's |
| Dont's |
| Files: |
| Links: |
|
Systemborders: If there is NO CONSENT FORM we proceed here: No consent form If we have OBTAINED CONSENT FORM we proceed here: Consent form obtained |
Open file of the candidate by clicking on his name.
Then we click on the last page called "Uploads"
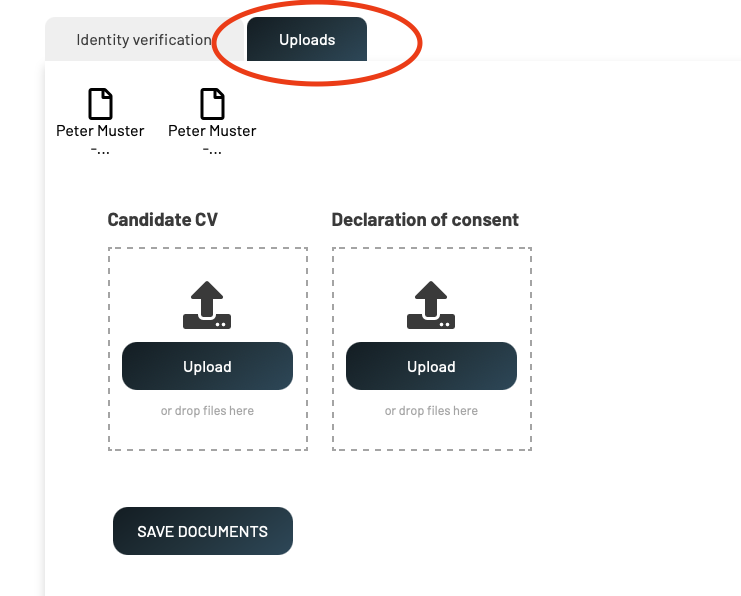
Open all files (in the picture above Blank page logo documents named Peter Muster) by clicking on them.
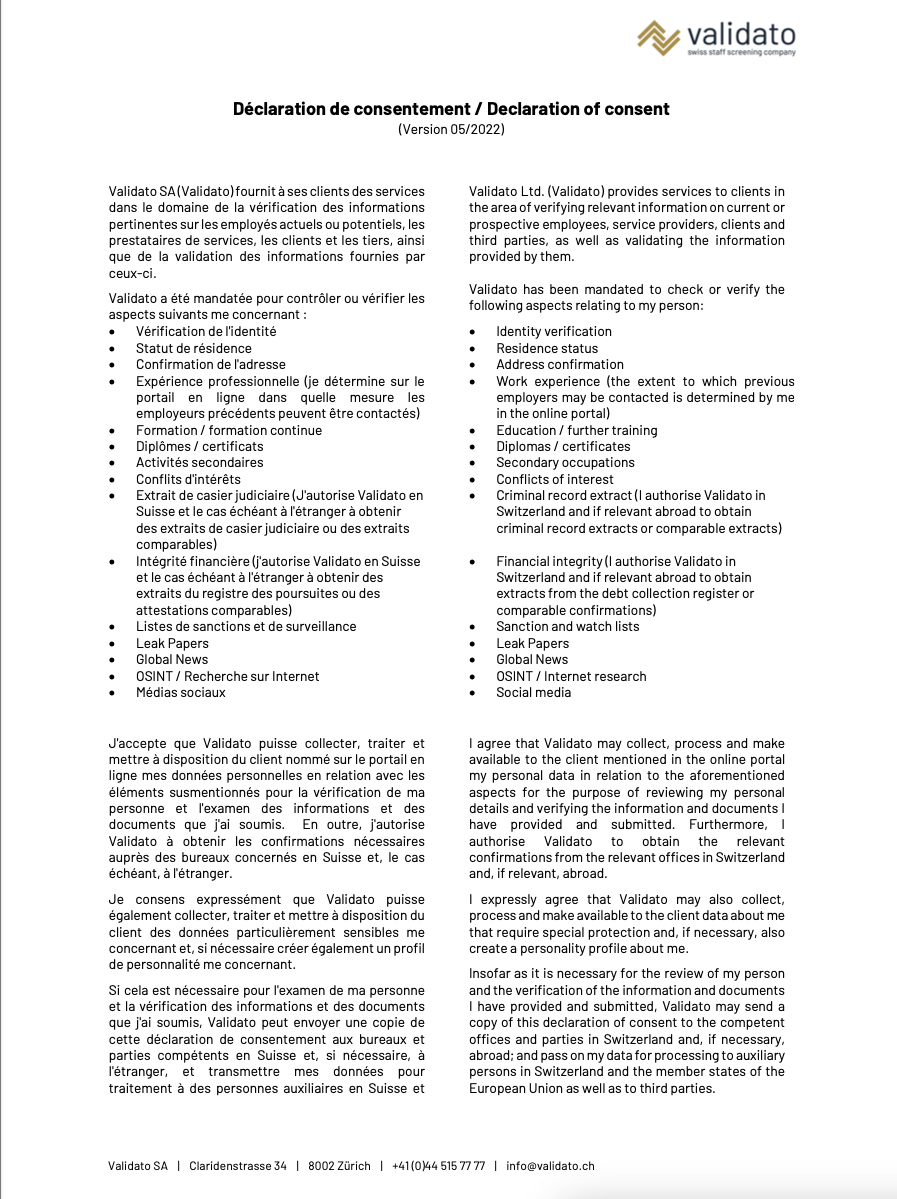
In the documents we search first for filled Validato Declaration of Consent form. Example below BUT there are more types of Declaration forms from Validato, all designed in same style only text is different, following one is only informative:
IMPORTANT!- There can be already uploaded consent forms from other companies but for us is important only Validato Declaration of consent
If there is NO CONSENT FORM we proceed here: No consent form
If we have OBTAINED CONSENT FORM we proceed here: Consent form obtained
Consent form obtained
IMPORTANT:
There can be already uploaded consent forms from other companies but for us is important only Validato Declaration of consent - If we dont have, proceed here: No Validato Consent form
Open the form by clicking on it.
First of all check if the points are correct:
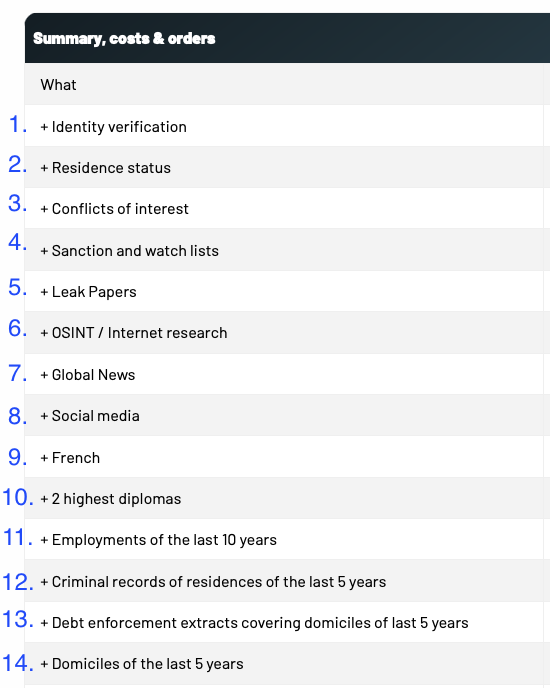
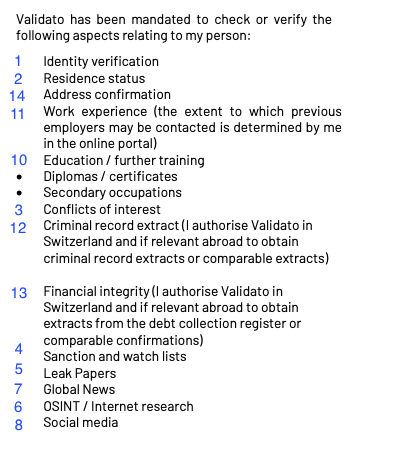
Aspects in the form must contain the requested information in the Batch (Click on the batch above the name of candidate).
(For better understanding: we can not verify something what we are not allowed - for what we have no consent)
- See following and compare:
BATCH: (required by customer) DECLARATION OF CONSENT:
As you can see:
All the information required by customer are in the the Decalration of consent.
(Point 9. is language in which the final report will be. It is NOT part of declaration of consent.)
There can be more points in declaration of consent than in the batch because we dont have form for every customised package BUT NEVER the other way.
Important: Sometimes candidate dont agree with the form and scratches out the points with whose he disagree. At this point contact superior, to confirm if the form is still sufficient or if we need to send the form again.
After
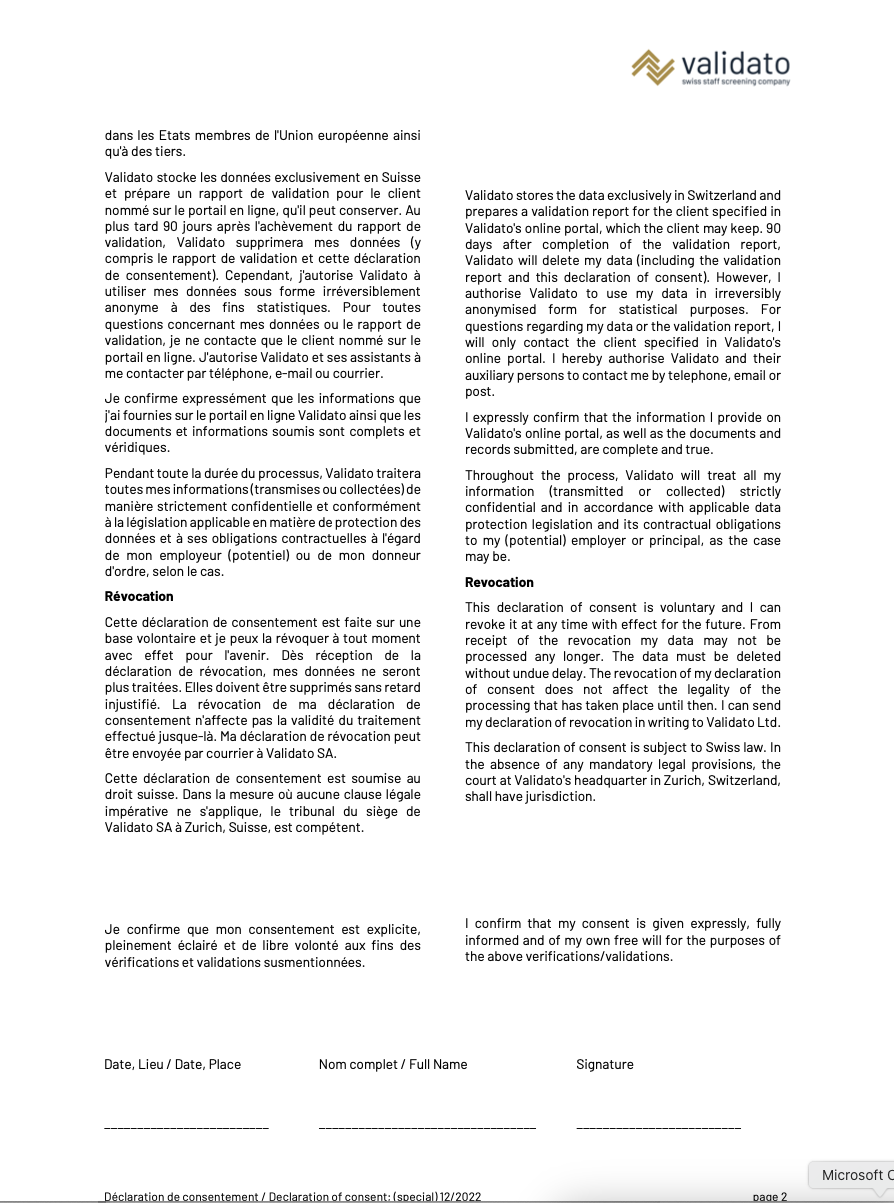
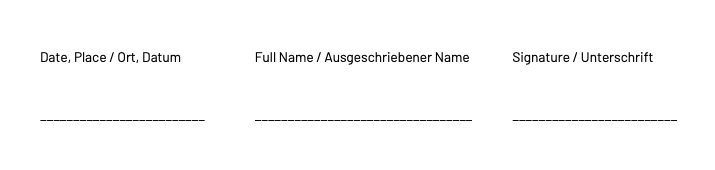
Second page of the form must contain all of following information written by candidate:
After the checking of the previous tasks something is missing- We resend the form back to candidate to fill the missing point.
If everything is correct we continue here: Preparing self declaration
No Consent form
In case when there is No consent form provided to us or there is wrong consent form we send the form to candidate by email.
- Step- setting the language
-In the Uploads is most of the time uploaded also the CV. There we can see which languages candidate speaks. Either we check his language levels and pick the one which is the highest, or if there is none we simply use the language in which is the CV written.
!!!The language in the Batch is for the customer, not candidate. Only if we have no CV, we can use the language stated there!!!
After we have the language picked, we put it in the first page in the candidates file called "Identity verification" and press save.
The language which will be saved there is the candidate's contact language for everyone.
2. Step - Choosing the right form
Form we choose by the 1. Aspects to be validated and 2. Language
Aspects in the form must contain the requested information in the Batch (Click on the batch above the name of candidate).
(For better understanding: we can not verify something what we are not allowed - for what we have no consent)
- See following and compare:
BATCH: (required by customer) DECLARATION OF CONSENT:
As you can see:
All the information required by customer are in the Declaration of consent.
(Point 9. is language in which the final report will be. It is NOT part of declaration of consent.)
There can be more points in declaration of consent than in the batch because we don't have form for every customized package BUT NEVER the other way.
If we found the form matching to our required information we start writing the Email.
3. Step - Writing the email
After clicking on the candidate's name and scrolling down we see the email of the candidate to which we are going to write.
In our prepared text file we search the text with correct language and copy it into email. (Example in english)
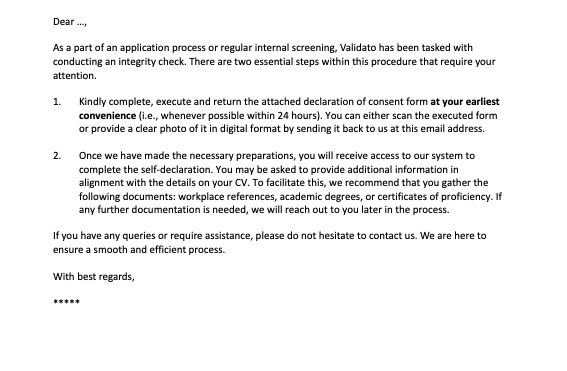
There we change only the name of the person to be contacted with appropriate addressing. For example Dear Mr. Smith/ Dear Ms. Smith. And attach the empty Declaration of the consent into attachment.
Recipient will be the candidate.
In the CC we put validations@validato.com
Subject: "Customer Company name" Declaration of Consent (of course in the correct language)
And send :)
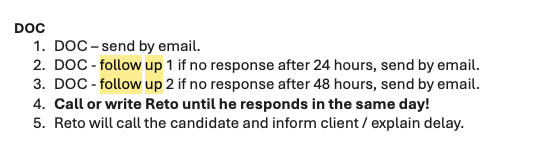
For the consent we wait max 24h.
If we have received it we proceed here: https://knowledge.validato.com/books/preparation/page/preparing-self-declaration
If we did not received we continue:
4. Reminder Email- No consent after 24 hours
We will forward the email what we sent to the candidate and write there also following: (From templates)
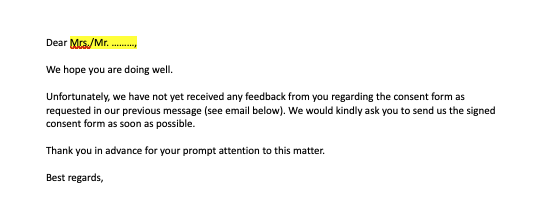
The follow ups for the DOC are following: